
- enterprise-jpa -01 (database persistence part).
- enterprise-ejb-01 (business logic handling part).
- enterprise-web-01 (web interface for user).
- enterprise-app-01 (project package deployed to application server as EAR file).
Download IDE (Eclipse)
You can download eclipse here.
After download, unzip and open eclipse ID.

Create Server

Fig.1 Create server
 |
Fig.2 Select Jbose Home Directory |
 |
Fig 3. Finish |
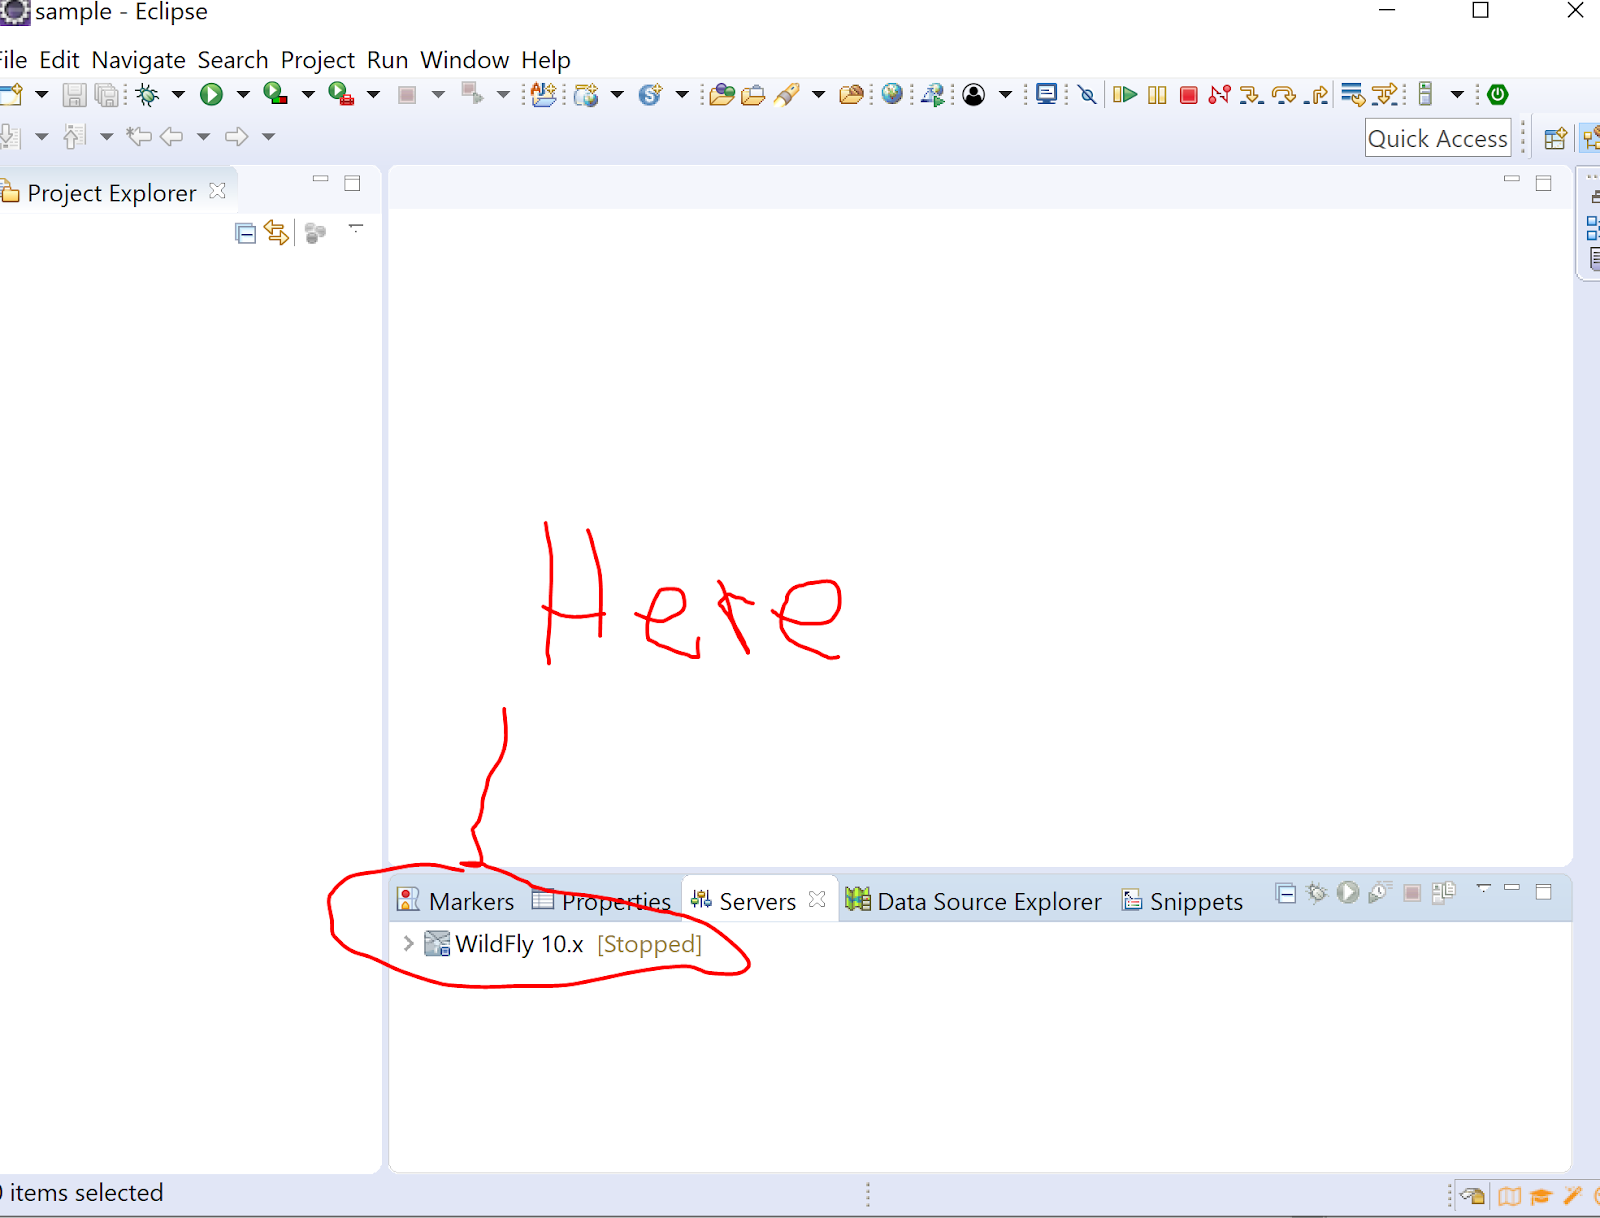 |
Fig 4. Finish Creating Server |
Create JPA project
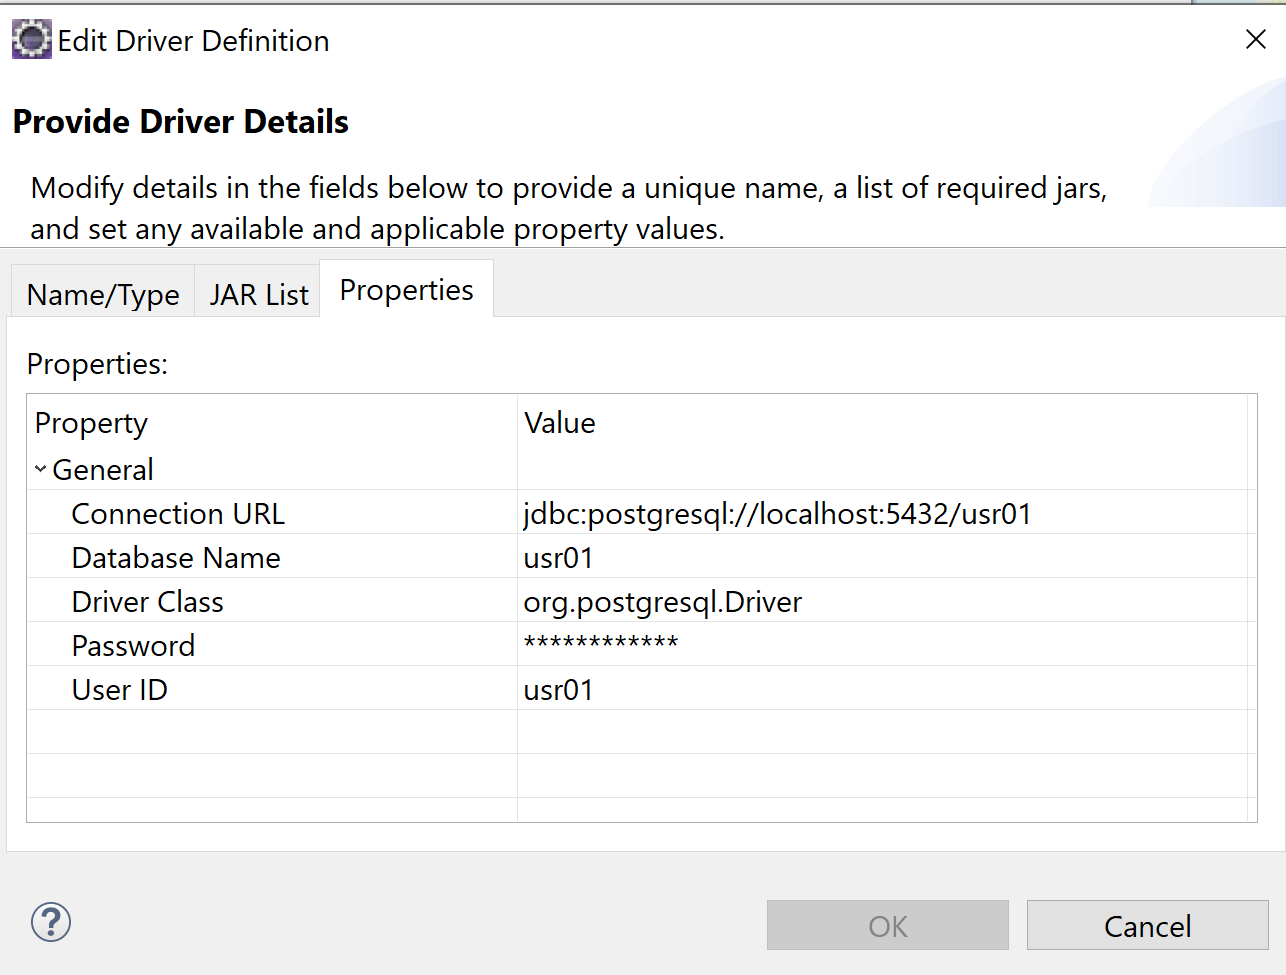
First, you need to create datasource to connect to database.

Create JPA project by New > JPA project.


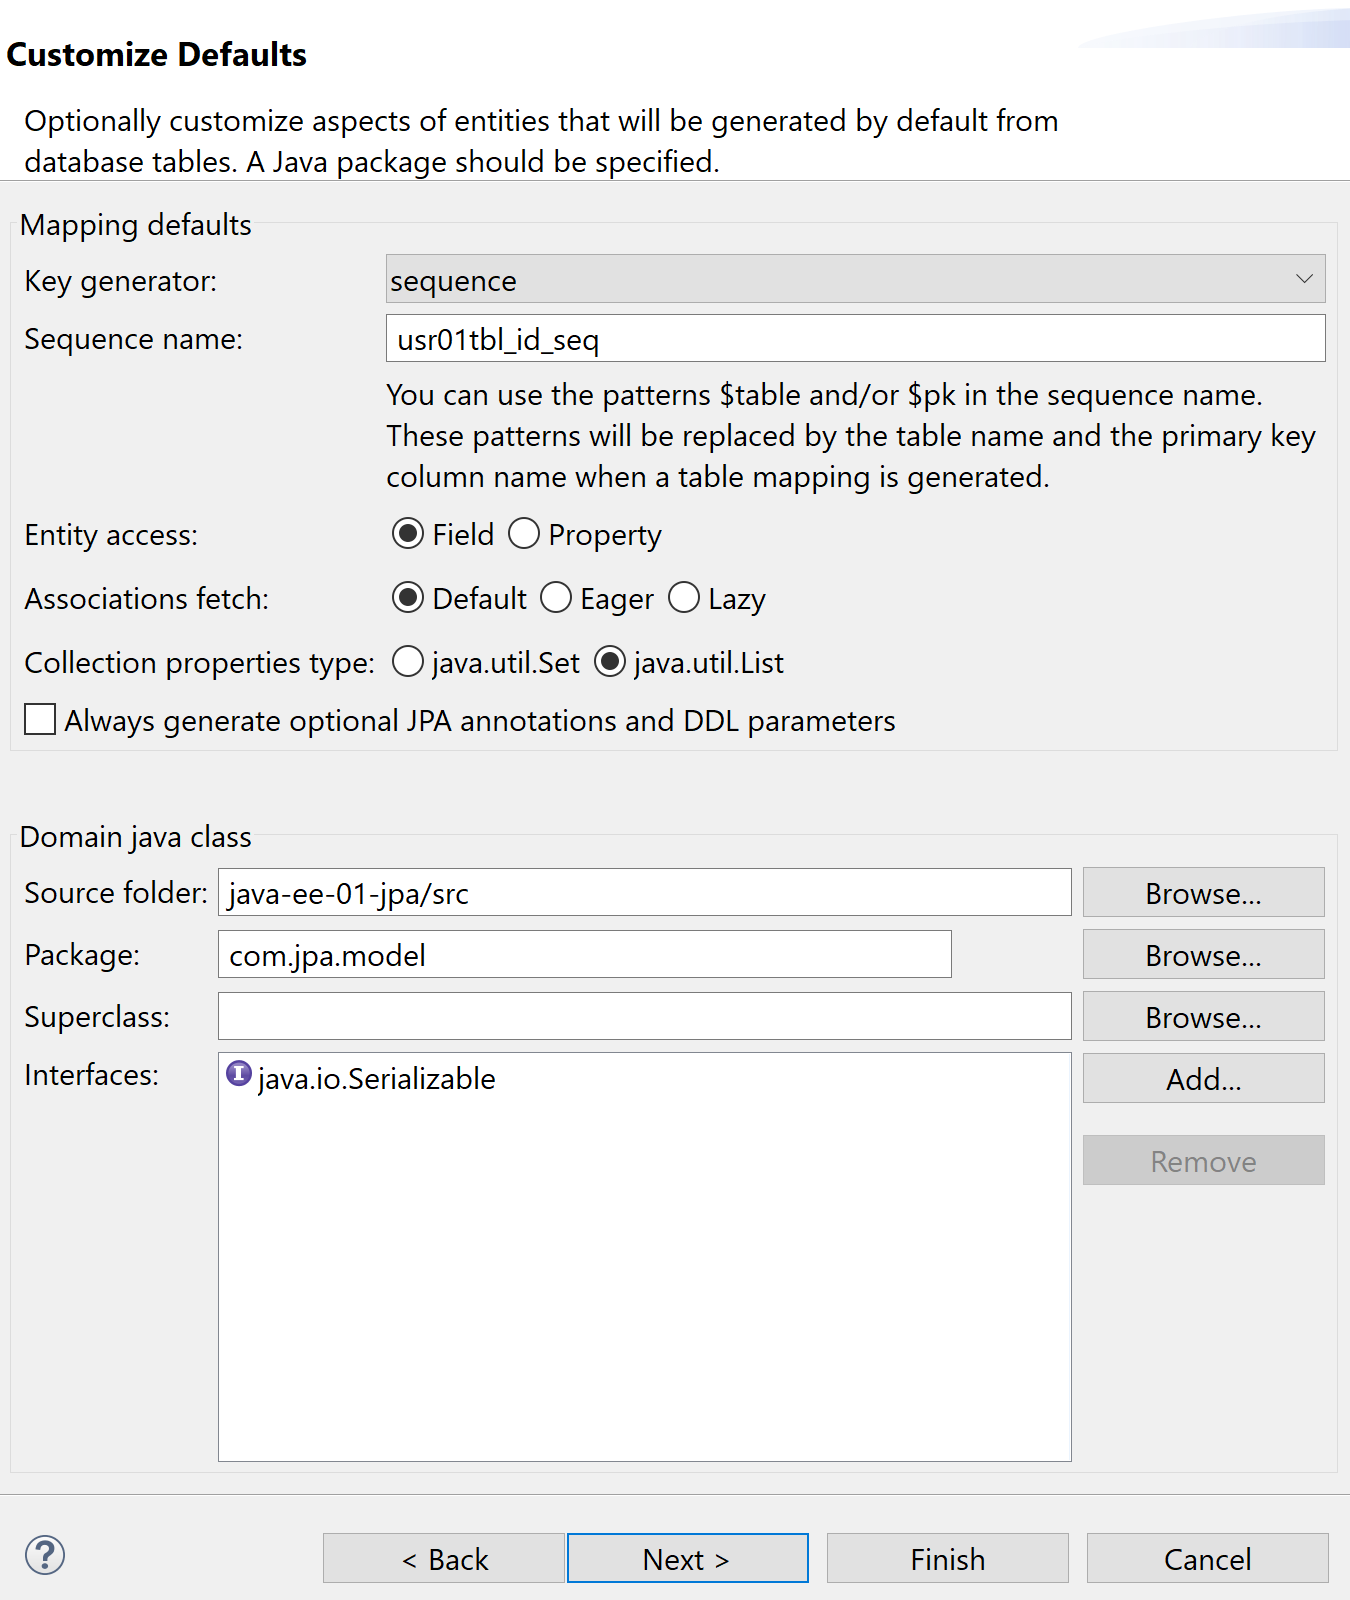
Now create JPA Entity Class.

Add Column annotation to entity class.
Create Entity Class as below
import java.io.Serializable;
import javax.persistence.*;
import javax.xml.bind.annotation.XmlElement;
import javax.xml.bind.annotation.XmlRootElement;
import javax.xml.bind.annotation.XmlType;
/**
* The persistent class for the usr01tbl database table.
*
*/
@Entity @XmlRootElement(name="User") @XmlType(propOrder= {"id","firstname","lastname"})
@Table(name="usr01tbl")
@NamedQuery(name="User.findAll", query="SELECT u FROM User u")
public class User implements Serializable {
private static final long serialVersionUID = 1L;
@Id
@SequenceGenerator(name="GENERATOR00", sequenceName="USR01TBL_ID_SEQ00",initialValue = 5, allocationSize = 1,schema="usr01")
@GeneratedValue(strategy=GenerationType.IDENTITY, generator="GENERATOR00")
@Column(name="id",updatable=false)
private Integer id;
@Column(name="firstname")
private String firstname;
@Column(name="lastname")
private String lastname;
public User() {
}
@XmlElement
public Integer getId() {
return this.id;
}
public void setId(Integer id) {
this.id = id;
}
@XmlElement(required=true)
public String getFirstname() {
return this.firstname;
}
public void setFirstname(String firstname) {
this.firstname = firstname;
}
@XmlElement(required=true)
public String getLastname() {
return this.lastname;
}
public void setLastname(String lastname) {
this.lastname = lastname;
}
}
Add jta-data-source resource to persistence.xml file.

 |
| Select Database Type |

enter connection information
 |
| Add caption |
 |
| Complete configuration |
 |
| Test Connection |
 |
| Finish |

Select JPA project

 |
| select JPA Entity from table |
 |
| Add caption |
 |
| Select table from the connection |
 |
| Finish |

Add Column annotation to entity class.
 |
| Add Column annotation |
package com.jpa.model;
import java.io.Serializable;
import javax.persistence.*;
import javax.xml.bind.annotation.XmlElement;
import javax.xml.bind.annotation.XmlRootElement;
import javax.xml.bind.annotation.XmlType;
/**
* The persistent class for the usr01tbl database table.
*
*/
@Entity @XmlRootElement(name="User") @XmlType(propOrder= {"id","firstname","lastname"})
@Table(name="usr01tbl")
@NamedQuery(name="User.findAll", query="SELECT u FROM User u")
public class User implements Serializable {
private static final long serialVersionUID = 1L;
@Id
@SequenceGenerator(name="GENERATOR00", sequenceName="USR01TBL_ID_SEQ00",initialValue = 5, allocationSize = 1,schema="usr01")
@GeneratedValue(strategy=GenerationType.IDENTITY, generator="GENERATOR00")
@Column(name="id",updatable=false)
private Integer id;
@Column(name="firstname")
private String firstname;
@Column(name="lastname")
private String lastname;
public User() {
}
@XmlElement
public Integer getId() {
return this.id;
}
public void setId(Integer id) {
this.id = id;
}
@XmlElement(required=true)
public String getFirstname() {
return this.firstname;
}
public void setFirstname(String firstname) {
this.firstname = firstname;
}
@XmlElement(required=true)
public String getLastname() {
return this.lastname;
}
public void setLastname(String lastname) {
this.lastname = lastname;
}
}
Add jta-data-source resource to persistence.xml file.

 |
set nane and add entity class |
 |
set datasource |
Set up hibernate property.
 |
Add Hibernate Property |
Create EJB Project
Ejb project will be consider as business logic handler included CRUD operation, transaction management, etc. In order to create EJB project just follow as below procedure.

Next is to create EJB class for CRUD operation.

Next


Finish. After finish add code to created class as below.
package com.ejb.crud;
import javax.ejb.LocalBean;
import javax.ejb.Stateless;
import javax.persistence.EntityManager;
import javax.persistence.PersistenceContext;
import javax.transaction.Transactional;
import com.jpa.model.User;
/**
* Session Bean implementation class UserEjb
*/
@Stateless(mappedName = "userEjb")
@LocalBean
public class UserEjb {
@PersistenceContext(name="java-ee-01-jpa")
private EntityManager em;
/**
* Default constructor.
*/
public UserEjb() {
}
@Transactional
public void save(User user) {
em.persist(user);
}
}
we need to add PostgreSQL database driver to poject. So I configure ejb project as maven project and add postgresql dirver package dependency through my pom.xml as below.import javax.ejb.LocalBean;
import javax.ejb.Stateless;
import javax.persistence.EntityManager;
import javax.persistence.PersistenceContext;
import javax.transaction.Transactional;
import com.jpa.model.User;
/**
* Session Bean implementation class UserEjb
*/
@Stateless(mappedName = "userEjb")
@LocalBean
public class UserEjb {
@PersistenceContext(name="java-ee-01-jpa")
private EntityManager em;
/**
* Default constructor.
*/
public UserEjb() {
}
@Transactional
public void save(User user) {
em.persist(user);
}
}
 |
| convert to maven project |
Edit pom.xml file as below.
<dependencies>
<dependency>
<groupId>org.postgresql</groupId>
<artifactId>postgresql</artifactId>
<version>42.2.5</version>
</dependency>
</dependencies>
<dependency>
<groupId>org.postgresql</groupId>
<artifactId>postgresql</artifactId>
<version>42.2.5</version>
</dependency>
</dependencies>
Create Web Project
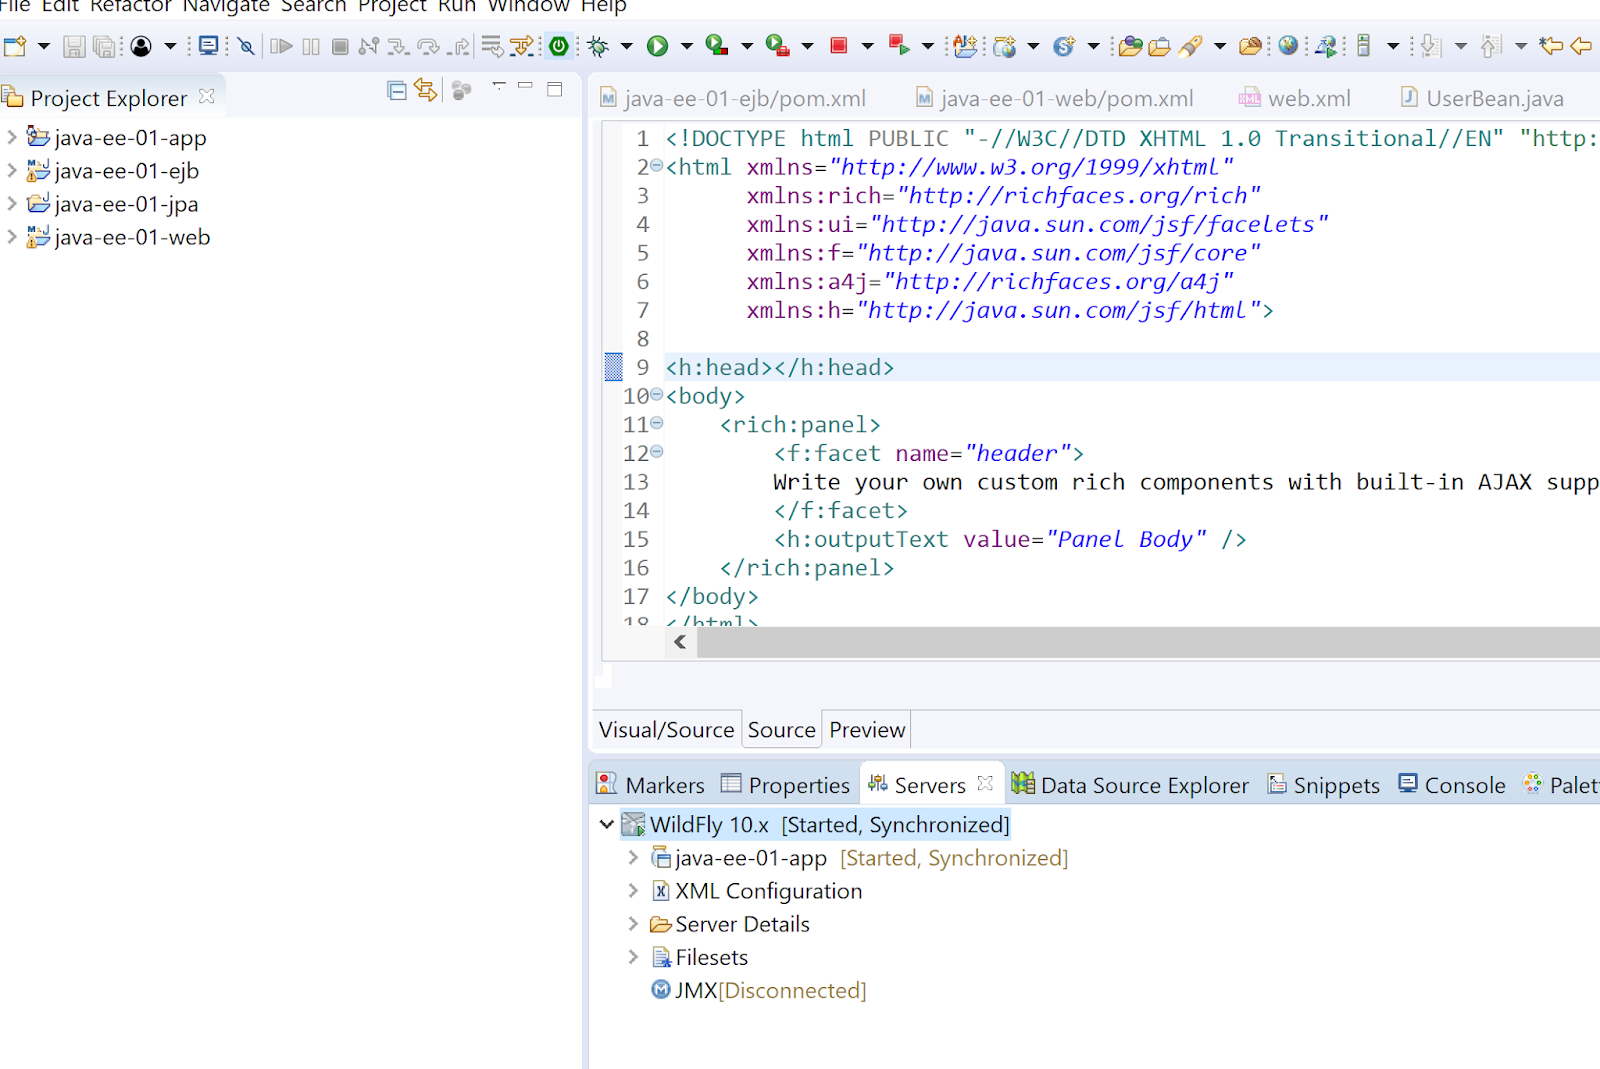
For user interface, we will create dynamic web project and use jsf to create user interface. |
| create dynamic web project |
 |
| select web environment |
 |
| finish |
<dependencies>
<dependency>
<groupId>org.richfaces</groupId>
<artifactId>richfaces</artifactId>
<version>4.5.17.Final</version>
</dependency>
</dependencies>
Next is to edit web.xml for JSF and richface skin.<dependency>
<groupId>org.richfaces</groupId>
<artifactId>richfaces</artifactId>
<version>4.5.17.Final</version>
</dependency>
</dependencies>
<?xml version="1.0" encoding="UTF-8"?>
<web-app xmlns:xsi="http://www.w3.org/2001/XMLSchema-instance" xmlns="http://xmlns.jcp.org/xml/ns/javaee" xsi:schemaLocation="http://xmlns.jcp.org/xml/ns/javaee http://xmlns.jcp.org/xml/ns/javaee/web-app_3_1.xsd" id="WebApp_ID" version="3.1">
<display-name>java-ee-01-web</display-name>
<welcome-file-list>
<welcome-file>index.xhtml</welcome-file>
</welcome-file-list>
<context-param>
<param-name>javax.faces.PROJECT_STAGE</param-name>
<param-value>Development</param-value>
</context-param>
<context-param>
<param-name>org.richfaces.skin</param-name>
<param-value>blueSky</param-value>
</context-param>
<servlet>
<servlet-name>Faces Servlet</servlet-name>
<servlet-class>javax.faces.webapp.FacesServlet</servlet-class>
<load-on-startup>1</load-on-startup>
</servlet>
<servlet-mapping>
<servlet-name>Faces Servlet</servlet-name>
<url-pattern>/faces/*</url-pattern>
</servlet-mapping>
<servlet-mapping>
<servlet-name>Faces Servlet</servlet-name>
<url-pattern>*.xhtml</url-pattern>
</servlet-mapping>
</web-app>
Add JPA project and EJB project to build path.<web-app xmlns:xsi="http://www.w3.org/2001/XMLSchema-instance" xmlns="http://xmlns.jcp.org/xml/ns/javaee" xsi:schemaLocation="http://xmlns.jcp.org/xml/ns/javaee http://xmlns.jcp.org/xml/ns/javaee/web-app_3_1.xsd" id="WebApp_ID" version="3.1">
<display-name>java-ee-01-web</display-name>
<welcome-file-list>
<welcome-file>index.xhtml</welcome-file>
</welcome-file-list>
<context-param>
<param-name>javax.faces.PROJECT_STAGE</param-name>
<param-value>Development</param-value>
</context-param>
<context-param>
<param-name>org.richfaces.skin</param-name>
<param-value>blueSky</param-value>
</context-param>
<servlet>
<servlet-name>Faces Servlet</servlet-name>
<servlet-class>javax.faces.webapp.FacesServlet</servlet-class>
<load-on-startup>1</load-on-startup>
</servlet>
<servlet-mapping>
<servlet-name>Faces Servlet</servlet-name>
<url-pattern>/faces/*</url-pattern>
</servlet-mapping>
<servlet-mapping>
<servlet-name>Faces Servlet</servlet-name>
<url-pattern>*.xhtml</url-pattern>
</servlet-mapping>
</web-app>


package com.jsf.bean;
import javax.annotation.PostConstruct;
import javax.ejb.EJB;
import javax.enterprise.context.RequestScoped;
import javax.inject.Named;
import com.ejb.crud.UserEjb;
import com.jpa.model.User;
@Named("userBean")
@RequestScoped
public class UserBean {
private User user;
@EJB
private UserEjb userEjb;
@PostConstruct
public void init() {
user = new User();
}
public void setUser(User user) {
this.user = user;
}
public User getUser() {
return this.user;
}
public String save() {
userEjb.save(this.user);
return "save.xhtml";
}
}
create user register form by using jsf.import javax.annotation.PostConstruct;
import javax.ejb.EJB;
import javax.enterprise.context.RequestScoped;
import javax.inject.Named;
import com.ejb.crud.UserEjb;
import com.jpa.model.User;
@Named("userBean")
@RequestScoped
public class UserBean {
private User user;
@EJB
private UserEjb userEjb;
@PostConstruct
public void init() {
user = new User();
}
public void setUser(User user) {
this.user = user;
}
public User getUser() {
return this.user;
}
public String save() {
userEjb.save(this.user);
return "save.xhtml";
}
}
<!DOCTYPE html PUBLIC "-//W3C//DTD XHTML 1.0 Transitional//EN" "http://www.w3.org/TR/xhtml1/DTD/xhtml1-transitional.dtd">
<html xmlns="http://www.w3.org/1999/xhtml"
xmlns:rich="http://richfaces.org/rich"
xmlns:ui="http://java.sun.com/jsf/facelets"
xmlns:f="http://java.sun.com/jsf/core"
xmlns:a4j="http://richfaces.org/a4j"
xmlns:h="http://java.sun.com/jsf/html">
<h:head></h:head>
<body>
<rich:panel>
<f:facet name="header">
Write your own custom rich components with built-in AJAX support
</f:facet>
<h:form>
<p>
<h:outputLabel value="firstname: " />
<rich:inplaceInput value="#{userBean.user.firstname}" defaultLabel="firstname"/>
</p>
<p>
<h:outputLabel value="lastname: " />
<rich:inplaceInput value="#{userBean.user.lastname}" defaultLabel="lastname"/>
</p>
<h:commandButton action="#{userBean.save}" value="save" />
</h:form>
</rich:panel>
</body>
</html>
and create response page as save.xhtml<html xmlns="http://www.w3.org/1999/xhtml"
xmlns:rich="http://richfaces.org/rich"
xmlns:ui="http://java.sun.com/jsf/facelets"
xmlns:f="http://java.sun.com/jsf/core"
xmlns:a4j="http://richfaces.org/a4j"
xmlns:h="http://java.sun.com/jsf/html">
<h:head></h:head>
<body>
<rich:panel>
<f:facet name="header">
Write your own custom rich components with built-in AJAX support
</f:facet>
<h:form>
<p>
<h:outputLabel value="firstname: " />
<rich:inplaceInput value="#{userBean.user.firstname}" defaultLabel="firstname"/>
</p>
<p>
<h:outputLabel value="lastname: " />
<rich:inplaceInput value="#{userBean.user.lastname}" defaultLabel="lastname"/>
</p>
<h:commandButton action="#{userBean.save}" value="save" />
</h:form>
</rich:panel>
</body>
</html>
<!DOCTYPE html PUBLIC "-//W3C//DTD XHTML 1.0 Transitional//EN" "http://www.w3.org/TR/xhtml1/DTD/xhtml1-transitional.dtd">
<html xmlns="http://www.w3.org/1999/xhtml"
xmlns:rich="http://richfaces.org/rich"
xmlns:ui="http://java.sun.com/jsf/facelets"
xmlns:f="http://java.sun.com/jsf/core"
xmlns:a4j="http://richfaces.org/a4j"
xmlns:h="http://java.sun.com/jsf/html">
<h:head></h:head>
<body>
<rich:panel>
<f:facet name="header">
Write your own custom rich components with built-in AJAX support
</f:facet>
<h:outputText value="Panel Body" />
</rich:panel>
</body>
</html>
Create Enterprise Application Project
Create Enterprise application project, and combine all three project as one. |
| creat project |
 |
| select environment |
 |
| select project |
 |
| deploy project |
 |
| result. |
No comments:
Post a Comment